Paypal Business Account Opening – This is a comprehensive guide on how to create and verify a Nigerian Business Paypal account that can send and receive payment easily without much stress. Incase you never knew, PayPal is the world’s number one online money transfer platform and is used by hundreds of millions of people worldwide to send and receive money.
Paypal Business Account Opening
For years, PayPal had basically shut Nigeria out due to our notoriety for internet related fraud. As things fraud detection techniques improved as well as Nigeria’s notion as the largest economy in Africa, PayPal has now lifted restrictions on Nigeria. Owning a PayPal account is quite simple and you can do that in two ways.
How to Create a Verified Business Paypal Account Easily
You can now open and verify your PayPal account with very easy procedures. The good news is that you can open the PayPal account yourself and it is free.
See Also: Link Virtual Bank Account to PayPal
How to Open a Normal Nigerian Paypal Account
To open a normal PayPal account in Nigeria that you can only use to purchase product or renew your plans like website hosting, domain name purchase etc.
Follow the simple steps below…
- First thing you do is visit the PayPal Website here
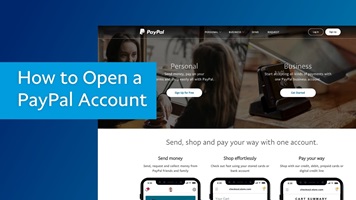
- Click on signup…select personal or business
- Personal will be for your personal debit card and business is for your company debit card (if you have one). I suggest you click personal if this is your first time.
- After selecting personal, click continue…you should see “Nigeria” in the drop down area, your email address and password.
- Fill in your email address (doesn’t have Gmail or Yahoo Account). It could be @yourcompanyname)
- Type in your password and make sure it is one you can remember
- Go to the next page and type other details such as names, date of birth, address and phone number.
- Also when filling in your address, make sure that it matches the same address details you filled when you opened a bank account
- It takes you to a page where you fill in your debit card details
- Type in your card number, expiry date and the last three digits behind your debit card.
- Go to your email account and click on verify
- Congratulations!!! Your account is set up
Test it by sending $10 to anyone or to your PayPal account abroad (if you have one)
You get debited in naira and you should get an alert from your local bank
How to Create a Nigerian Business Paypal Account
To open Nigerian PayPal business account that accept payment follow the instructions below:
2. Type in your Email address and click “Get Started” button
3. Fill the signup form accurately with authentic information
4. Scroll down to accept the agree to the User Agreement and Privacy Policy.
5. Click the “Agree and Continue” button
6. Supply your business information and click “Continue”
7. Provide information about yourself and click “Submit”
8. Provide more details about your organization ( a short questionnaire about tax return) and click “Continue”
9. Certify and submit your application –You are done.
10. Head up to your email address to confirm your email and follow other instructions.
Congratulations, you now have a Nigerian Business PayPal account. But That’s not all…
This Nigerian business PayPal account will not just accept PayPal like that o… Whenever someone want to send money to you, the sender will see this error message in his/her paypal dashboard.
This recipient accepts PayPal payments only through their website. To complete this payment, please go to their website and follow their instructions, or email the recipient for instructions.
You May Like: How To Create Payoneer Account
How to Link a Card to Your Paypal Account
After successful creating your paypal account, the next step is to link it with your mastercard or other supported cards. You can link more than one card to your paypal account. I actually linked two cards to mine.
To do this, follow the simple steps below…
- Simply login in to your Internet banking account using your password and token
- Choose the “PayPal wallet” in the main tab and click “create PayPal wallet” on the drop down menu.
- Select which cards you wish to link to your PayPal account and which card will be the default card. Try using one card for easy reconciliation
- Press the button on your online token and confirm accordingly
- Create a password in the pop up window that appears
- Click on “agree and create account”.
- Go to your registered email account with the bank which confirms that you have created a PayPal account.
You are done.
For questions and contributions about Paypal Business Account Opening – How to Create a Verified Business Paypal Account Easily
We believe this article was helpful, if yes, don’t hesitate to share this information with your friends on Facebook, Twitter, Whatsapp and Google plus.
Thanks!!!